Pressure Cooker Safety Valve Leaking Steam: 7 Fixes
James Okafor
Coffee & Cooking Appliance Specialist
Table of Contents
On this page
18Pressure cooker safety valve leaking steam is a serious problem — and not just a nuisance. Steam escaping from the wrong place means your cooker is not sealing properly, which prevents it from reaching cooking pressure and can signal a genuine safety hazard if left untreated.
The good news: seven distinct causes account for virtually every steam leak from a pressure cooker safety valve. Most are fixable in under 10 minutes with no tools. This guide covers each cause in order of likelihood, with a direct step-by-step fix for each. It applies to electric pressure cookers (Instant Pot, Cosori, Ninja Foodi) and stovetop models alike.
If your cooker has been leaking and also failing to pressurize, our pressure cooker not building pressure troubleshooting guide addresses that related fault in full. For a direct comparison of pressure cookers versus other cooker types, see our Instant Pot vs slow cooker breakdown.
What You Will Need#
Gather these before starting:
- Clean dry cloth or paper towels
- Small bowl of warm soapy water
- Flashlight or phone torch (to inspect valve channels)
- Replacement sealing ring sized to your exact model (optional — keep one in stock)
- Replacement float valve silicone cap (optional — costs under $3, available on Amazon)
- Manufacturer warranty paperwork if your unit is under two years old
No specialist tools are required for any of the seven fixes below.
Is a Pressure Cooker Safety Valve Leak Dangerous?#
The short answer: it depends on where the steam is coming from. Not all steam release during cooking is a fault. Understanding which steam is normal and which signals a problem is the first step.
Normal Steam Release (Not a Fault)#
- Steam release valve venting deliberately: When you manually open the steam release valve or knob to quick-release pressure, steam exits in a forceful stream. This is correct and expected.
- Initial steam before sealing: During the first two to five minutes of pressurization, a small amount of steam escapes from around the lid as the sealing ring expands to fill the lid channel. This stops once pressure builds.
- Steam from the float valve during venting: As internal pressure drops during release, the float valve area produces steam. Normal.
Abnormal Steam Release (Needs Fixing)#
- Continuous steam from the float valve while at pressure: The float valve should be fully raised and sealed during cooking. Steam escaping around it signals a worn or missing float valve cap.
- Steam leaking from the lid rim throughout cooking: The sealing ring has failed, is seated incorrectly, or is missing.
- Steam from the safety overpressure valve (the small secondary valve): This valve only opens under dangerous over-pressure conditions. If it opens during a normal cook cycle, the steam release valve is blocked.
- Steam escaping from the handle joint or lid hinge: Physical damage to the lid requires immediate inspection.
Warning: Never attempt to force open a pressure cooker lid while steam is present. Always use the steam release valve to depressurize fully before opening. The float valve dropping flat confirms it is safe to open.
Why Is My Pressure Cooker Safety Valve Leaking Steam: 7 Causes and Fixes#
Fix 1: Worn or Damaged Float Valve Silicone Cap#
This is the most common cause of pressure cooker safety valve leaking steam on electric models. The float valve — the small metal pin that rises when pressure builds — has a tiny silicone cap on its underside. This cap creates the seal between the valve pin and the lid housing. When the cap wears flat, cracks, or becomes coated in grease residue, steam bypasses the seal and escapes around the float valve during cooking.
How to diagnose:
- Remove the lid and turn it upside down.
- Locate the float valve. It is the small metal pin — usually silver or gold — near the rim of the lid.
- Push the float valve upward from the underside. It should move smoothly.
- Examine the silicone cap seated in the float valve housing. It is a small, dome-shaped rubber component.
- Check for flattening, cracking, or a greasy, compressed appearance. A healthy cap is plump and springy.
How to fix:
- On most Instant Pot and Cosori models, the float valve pulls straight out with a firm upward tug.
- Remove the old silicone cap and discard it.
- Press the new cap into position — flat side down, dome side facing the valve pin.
- Reinsert the float valve and test that it moves freely.
- Run a water test (two cups of water, five minutes on High Pressure) to confirm the leak is resolved.
Replacement float valve kits cost $3–$8 and include the cap, the pin, and a spare. Always buy parts specified for your exact model and quart size.
Pro Tip: Keep a replacement float valve kit stored with your cooker. The silicone cap is the single smallest and cheapest component that causes the most dramatic steam leaks. Replacing it takes under two minutes once you have the part.
Fix 2: Sealing Ring (Gasket) Failure or Misseating#
A failed sealing ring is the second most common cause of pressure cooker safety valve leaking steam. The sealing ring — a large silicone or rubber ring that seats inside the lid — creates the primary airtight seal. When the ring is cracked, swollen, hardened with age, or simply not seated correctly, steam escapes around the entire lid rim rather than staying contained. This presents as a visible hiss or steam cloud from the lid edge rather than the valve area.
However, a partially failed sealing ring can also direct steam toward the path of least resistance — which is often the float valve housing — making it appear as a valve leak when the true fault is the ring.
How to diagnose:
- Remove the sealing ring from the lid channel.
- Inspect it under good light. Look for cuts, cracks, warping, or permanent deformation.
- Flex the ring. A healthy ring is pliable and springs back. A degraded ring feels stiff, brittle, or develops white stress marks when flexed.
- Check for strong odours. A ring saturated with cooking residue expands and contracts differently from a clean ring, breaking the seal under pressure.
- Reseat it by pressing it firmly and evenly around the entire channel, starting from one point and working all the way around. No section should sit proud of the channel surface.
How to fix:
- If the ring is damaged, replace it immediately. Sealing rings cost $8–$15 and are model-specific. Always match by cooker size (3-quart, 6-quart, or 8-quart).
- If the ring looks intact, remove it, wash thoroughly in warm soapy water, dry completely, and reseat it carefully.
- Replacement is recommended every 12–18 months for regular users, or sooner if the ring absorbs strong food odours.
Pro Tip: Many experienced pressure cooker owners keep two sealing rings — one dedicated to savoury dishes and one for sweet or neutral recipes. Silicone absorbs odours over time. A curry-scented ring on a custard batch is not just unpleasant — it may also be stiff enough from residue to compromise the seal.
Fix 3: Debris in the Float Valve Channel#
Debris in the float valve channel is a frequently overlooked cause of pressure cooker safety valve leaking steam. Food starch, mineral scale, and cooking residue accumulate in the float valve channel over time. Even a small amount of debris under the float valve or around its housing seat prevents the valve from seating flush when pressure builds. Steam finds the gap and escapes continuously.
How to diagnose:
- Remove the float valve completely.
- Shine a flashlight into the float valve housing in the lid.
- Look for starch buildup (white or grey film), mineral scale (white crystalline crust), or food particles.
- Run a fingernail or toothpick around the inside of the housing channel. Any resistance confirms debris.
How to fix:
- Soak the float valve and its housing area with warm soapy water for five minutes.
- Use a soft-bristled brush (an old toothbrush works perfectly) to scrub the inside of the housing channel.
- For mineral scale buildup, soak the valve assembly in white vinegar for 15 minutes, then scrub and rinse.
- Dry all components fully before reassembling.
- Run a water test before cooking to confirm the valve seals cleanly.
Hard water creates scale buildup faster than soft water. If you live in a hard water area, clean the float valve housing after every 10–15 cooking sessions.
Fix 4: Blocked or Obstructed Steam Release Valve#
A blocked steam release valve is another common driver of pressure cooker safety valve leaking steam through unexpected locations. The steam release valve (the knob or lever on top of the lid that you turn to Sealing or Venting) and its internal passage can become blocked by starchy cooking residue. When this passage is partially blocked, steam cannot release freely through the correct channel — so it finds alternative exits, including the float valve area and the lid rim.
This is a particularly common cause after cooking starchy foods: pasta, beans, oatmeal, rice, or soups with thick bases. These produce foam and starch-loaded steam that deposits inside the valve body.
How to diagnose:
- Remove the steam release valve from the lid (most models pull or twist off without tools).
- Hold it up to the light and look through the valve body. You should see a clear passage.
- Blocked valves show visible residue, foamy deposit, or reduced light transmission.
- Alternatively, blow gently through the valve. Clear airflow = unobstructed. Resistance = blocked.
How to fix:
- Soak the valve body in warm soapy water for 10 minutes.
- Use a thin brush, pipe cleaner, or toothpick to clear the internal passage.
- Rinse and dry completely before reattaching.
- For heavy starch deposits, a 15-minute soak in white vinegar dissolves buildup effectively.
Pro Tip: After cooking high-starch foods, run the steam release valve under hot water immediately rather than waiting for it to cool and harden. A 30-second rinse after each cook prevents the kind of blockage that requires scrubbing.
Fix 5: Anti-Block Shield Clogged or Missing#
The anti-block shield is the dome-shaped stainless steel cover on the inside of the lid, directly over the steam exit point. Its job is to prevent food and foam from entering the steam release valve during pressurized cooking. When it becomes clogged, steam pressure builds behind it and seeks alternative exit routes — including the float valve housing and sealing ring perimeter.
On some models, the anti-block shield is also removable and users accidentally replace it incorrectly or omit it entirely, leaving the steam passage directly exposed to food.
How to diagnose:
- Look at the underside of the lid. The anti-block shield is the small domed metal cover near the centre.
- On Instant Pot models, it twists off counterclockwise.
- Inspect it for food residue, starch buildup, or physical damage.
- Check that it is seated correctly — flat base flush with the lid surface, dome facing downward.
How to fix:
- Remove the shield and scrub with warm soapy water and a brush.
- Rinse and dry thoroughly.
- Reinstall with the correct orientation — dome faces the pot interior, not the lid exterior.
- Confirm it is secured (twist clockwise to lock on Instant Pot models).
Clean the anti-block shield every 10–15 uses. It is one of the most neglected components in pressure cooker maintenance.
Fix 6: Lid Not Locking Correctly#
A pressure cooker lid that is not fully locked into all locking positions cannot create a complete seal. Steam escapes at the weakest point — usually the area of the lid furthest from the last locked lug. This presents as an intermittent steam leak that appears at different points around the lid rim, rather than consistently from one location.
Partial lid locking is especially common after deep cleaning, when locking lugs have been dried and reassembled, or when food debris under the rim prevents the lid from sitting flat.
How to diagnose:
- Remove the lid completely and inspect the rim of the inner pot. Look for food debris, especially around the raised lip where the lid seats.
- Clean the rim thoroughly with a damp cloth.
- Reattach the lid and rotate it to the locked position. Listen and feel for the click of every locking tab engaging.
- Attempt to rotate the lid slightly beyond the locked position. If it moves even a few millimetres further, a lug has not engaged.
How to fix:
- Clean the inner pot rim and the underside of the lid rim completely.
- Re-close the lid deliberately and slowly, feeling for each engagement point.
- On Instant Pot and Cosori models, the lid requires a firm downward press before rotating to lock.
- Inspect the locking lugs visually. A bent or damaged lug requires a warranty claim or lid replacement.
If your cooker is under warranty, a lid that cannot lock fully is covered. Our best Instant Pots guide covers the most reliable current models with the best lid-sealing mechanisms tested in 2026.
Fix 7: Overpressure Safety Valve Activating#
Every pressure cooker has a secondary overpressure safety valve — a backup release that vents excess pressure if the primary steam release valve becomes blocked during cooking. If you see pressure cooker safety valve leaking steam from a small secondary valve or from a rubber plug on the lid, the primary steam release passage is obstructed and the safety valve is working exactly as designed.
This is not a valve fault. It is a warning sign.
How to diagnose:
- Steam releases from a small pop-up plug, rubber bung, or secondary pin on the lid (not the primary float valve or steam release knob)
- The cooker reaches pressure but then vents through an unexpected location
- The primary steam release valve shows heavy residue or is completely blocked when inspected
How to fix:
- Stop cooking immediately. Allow pressure to drop naturally or through the primary steam release valve if it is functional.
- Wait until the float valve drops flat and the unit is fully depressurized before opening.
- Clean the primary steam release valve and anti-block shield thoroughly following Fix 4 and Fix 5 above.
- Run a water-only test before cooking food again to confirm the primary steam passage is clear.
- If the overpressure valve has been damaged by activation, contact the manufacturer. A damaged overpressure valve is a warranty or safety replacement item.
Warning: Never cook again after the overpressure safety valve has activated without first clearing the primary steam path. Repeated overpressure events risk damaging the valve seat and compromising the lid's safety mechanism.
Complete Diagnostic Sequence: Stop Pressure Cooker Safety Valve Leaking Steam#
Work through this sequence in order to identify your specific fault:
- Identify the leak location — Is steam coming from the float valve pin area, the lid rim, the steam release knob, or a secondary valve?
- Float valve area → Check Fix 1 (silicone cap) and Fix 3 (debris in channel)
- Full lid rim → Check Fix 2 (sealing ring) and Fix 6 (lid not locking)
- Steam release knob area → Check Fix 4 (blocked steam release) and Fix 5 (anti-block shield)
- Secondary valve or rubber plug → Fix 7 (overpressure valve activating — clean primary path first)
- Multiple locations simultaneously → Start with Fix 2 (sealing ring failure) — this is the root cause of multi-point leaks
Total diagnostic time: 10–15 minutes.
Pressure Cooker Safety Valve Maintenance: Prevent Leaks Before They Start#
Steam leaks from safety valves are almost always preventable. Pressure cooker safety valve leaking steam is the result of deferred maintenance in the majority of cases. These habits extend the life of your pressure cooker and prevent every type of steam leak covered above:
- Inspect the float valve cap before every cook. It takes five seconds. Replace it at the first sign of flattening.
- Remove and wash the sealing ring after every use. Store it separately — not installed in the lid — to prevent odour absorption and deformation from compression.
- Clean the steam release valve after cooking starchy foods. Oatmeal, beans, rice, and pasta require immediate valve rinsing.
- Clean the anti-block shield every 10–15 cooks. It prevents the most serious blockage-related steam events.
- Wipe the inner pot rim after each use. Food residue on the rim prevents a full lid seal.
- Descale the float valve housing monthly if you live in a hard water area. Use a white vinegar soak for five minutes.
- Replace the sealing ring every 12–18 months. This is the single most cost-effective maintenance step for any pressure cooker.
Replacement Parts Reference#
The table below covers the parts most commonly needed to fix pressure cooker safety valve leaking steam. Use it alongside the seven fixes above to source exactly what your repair requires:
| Part | Average Cost | Replacement Frequency | Where to Buy |
|---|---|---|---|
| Float valve silicone cap | $3–$8 | Every 1–2 years | Amazon, manufacturer site |
| Sealing ring (6-qt) | $8–$15 | Every 12–18 months | Amazon, manufacturer site |
| Steam release valve | $8–$12 | Every 2–3 years | Amazon, manufacturer site |
| Anti-block shield | $5–$10 | Rarely — only if damaged | Manufacturer site |
| Full lid replacement | $20–$40 | Only if lid is damaged | Manufacturer site |
Always buy parts designated for your exact model number. A 6-quart ring does not seal a 3-quart or 8-quart lid correctly.
When to Replace Your Pressure Cooker#
A pressure cooker safety valve leaking steam that persists after replacing the sealing ring and float valve cap — with all other components clean and intact — has a structural lid problem. Lid warping, cracked housing, or damaged locking lugs are not repairable at home. Replace the unit if:
- Steam leaks persist after replacing the sealing ring and float valve cap
- The lid does not lock fully despite a clean inner pot rim
- The overpressure valve has activated more than once in a cooking session
- The unit is over six years old with daily use and has developed multiple simultaneous leak points
The Instant Pot Duo Plus 6-Quart and Instant Pot Pro 6-Quart both feature redesigned lid-sealing systems with more durable float valve assemblies compared to older generation units. As of 2026, both remain the most reliable electric pressure cookers at the $80–$130 price point.
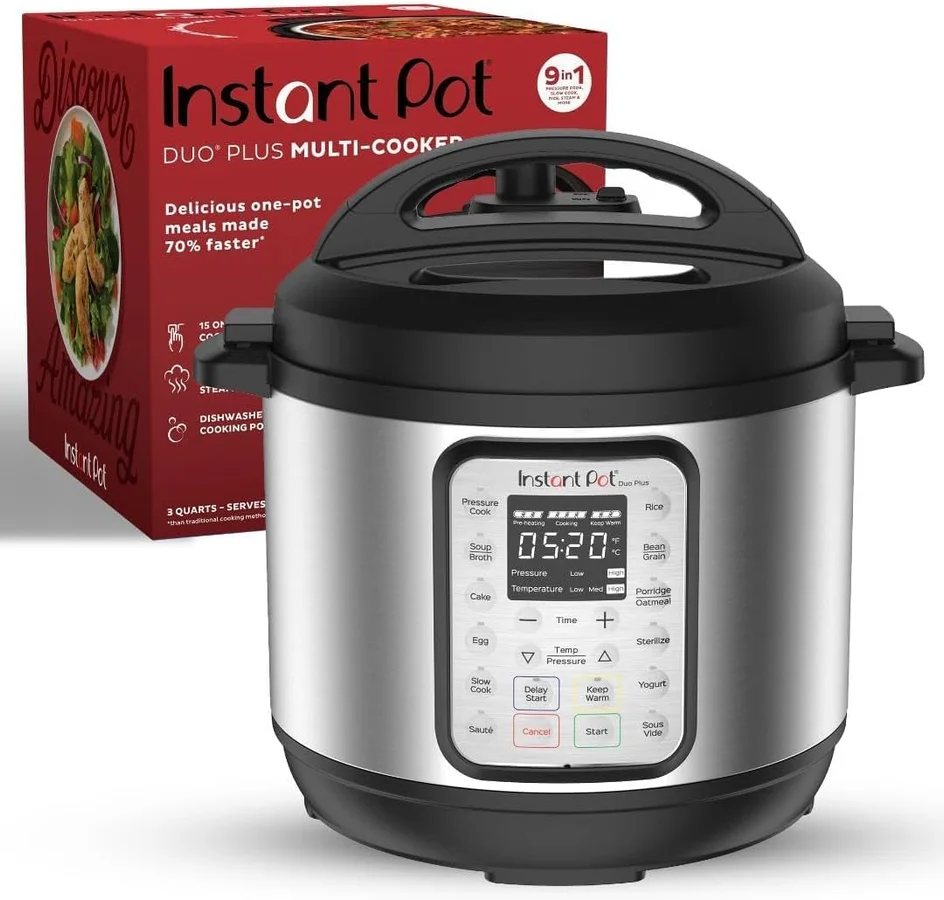
Instant Pot
Instant Pot Duo Plus 6QT 9-in-1
Our Rating
Amazon
Price
$99.99
Key Specifications
Pros & Cons
Pros
- Excellent feature-to-price ratio
- WhisperQuiet steam release (74 dB)
- 9 cooking functions
- dishwasher-safe lid and pot
- includes 2 sealing rings
- tri-ply stainless steel inner pot
Cons
- Lid alignment tricky for beginners
- bulky for small cabinets
- 1-year warranty is short
- no air fry capability
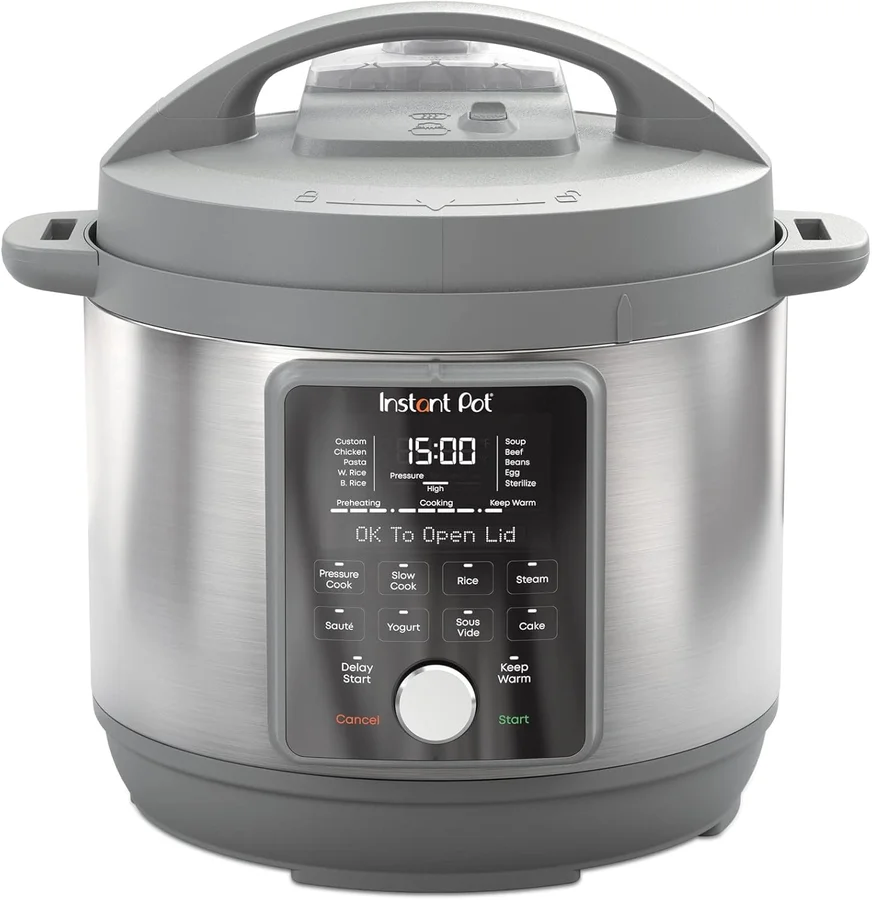
Instant Pot
Instant Pot Pro 6QT 10-in-1
Our Rating
Amazon
Price
$129.99
Key Specifications
Pros & Cons
Pros
- Best sauté performance
- safest steam release system
- custom memory presets
- silicone-handled inner pot is stovetop compatible
- even heat distribution
- 28 customizable programs
Cons
- $40-50 premium over Duo Plus for similar pressure cooking results
- fixed power cord
- cake and egg presets are niche
- diminishing returns for casual users
The Cosori Pressure Cooker 6-Quart offers a simplified valve design that is particularly easy to clean — a strong choice if valve maintenance difficulty is your primary concern.

Cosori
Cosori 6QT Pressure Cooker 9-in-1
Our Rating
Amazon
Price
$80.99
Key Specifications
Pros & Cons
Pros
- Best value per feature
- fastest time-to-pressure (8 min)
- ceramic nonstick pot PFOA/PTFE-free
- 1100W most powerful standard element
- dishwasher-safe everything
- 12 safety mechanisms
Cons
- Longer preheat than Instant Pot
- smaller accessory ecosystem
- Cosori-specific replacement parts only
- less brand community support
For a full breakdown of what to look for in a replacement, our pressure cooker and multi-cooker buying guide covers every key specification. You can also browse our best multi-cookers under $200 for tested alternatives across every budget.
Frequently Asked Questions#
Frequently Asked Questions
8 questions answered
The most common reason a pressure cooker safety valve is leaking steam is a worn or flattened float valve silicone cap. Other frequent causes include a damaged or misseated sealing ring, debris clogging the float valve channel, or a blocked steam release valve that forces steam to exit through the float valve area instead. Identify which valve is leaking first, then work through the fix for that specific component.
No. A pressure cooker safety valve leaking steam — or any steam leak from the lid rim — should not be used until the fault is identified and fixed. Steam escaping during cooking means the cooker is not sealing correctly, which prevents safe pressure buildup and can indicate a component failure. Stop the cook, fully depressurize the unit, and diagnose the leak before using again.
The most effective fix is replacing the float valve silicone cap — the small rubber dome on the underside of the float valve pin. Remove the float valve, discard the old cap, press a new cap into place, and reinstall. If that does not resolve the leak, inspect the float valve channel for debris and clean it with a soft brush and warm soapy water. Replacement caps cost $3–$8 and take under two minutes to install.
Replace your pressure cooker sealing ring every 12–18 months with regular use, or sooner if it shows cracks, permanent deformation, or strong odour absorption that does not wash out. Heavy users cooking four or more times per week should replace the ring every 8–12 months. Always match the replacement to your exact model number and quart size — rings are not interchangeable between sizes.
Pressure cooker safety valve leaking steam from the lid rim almost always indicates a sealing ring fault — the ring is damaged, degraded, or not seated correctly in the lid channel. Remove the ring, inspect it for cracks or stiffness, and reseat it firmly all the way around if it appears intact. If the ring is over 18 months old or shows any physical damage, replace it. Also inspect the inner pot rim for food debris that prevents the lid from sitting flat.
The overpressure safety valve releases steam when the primary steam release valve is blocked and internal pressure exceeds the safe limit — a case of pressure cooker safety valve leaking steam through the backup mechanism rather than the primary path. This safety feature is working correctly, but it signals a dangerous blockage. Stop cooking, depressurize the unit, and thoroughly clean the steam release valve and anti-block shield before cooking again.
No. A cracked sealing ring must be replaced before the cooker is used again. A cracked ring will not seal under pressure, which means the cooker cannot reach cooking pressure safely. Continuing to cook with a cracked ring also risks the crack widening suddenly during pressurization. Sealing rings cost $8–$15 and are available on Amazon and from manufacturers, usually with next-day delivery.
A small amount of steam escaping during the first two to five minutes of pressurization is normal. The sealing ring expands slightly as it heats, filling the lid channel more completely and closing any initial gaps. If steam escaping at the start stops completely once pressure builds and the float valve rises, the cooker is working correctly. Steam that continues throughout the cook cycle — especially around the float valve — is an abnormal leak that needs investigation.
Final Verdict#
Pressure cooker safety valve leaking steam traces to one of seven causes in virtually every case. The float valve silicone cap and the sealing ring are responsible for over 80% of all reported steam leaks. Both are $3–$15 fixes that take under five minutes. Debris in the float valve channel and blockage in the steam release valve account for most of the remainder.
Work through the diagnostic sequence above before assuming your pressure cooker needs replacing. Identify exactly which valve is leaking, apply the corresponding fix, and run a water test to confirm the repair. A pressure cooker that passes a clean water test is safe to use and will continue cooking reliably for years.
If leaks persist after addressing all seven causes, the lid has a structural fault and replacement is warranted. See our best Instant Pots guide for the most reliable current models, all tested for long-term sealing performance.
All prices in this article are approximate estimates. Prices vary by retailer and change over time. Verify current pricing on Amazon and manufacturer websites before purchasing.