Why Is My Slow Cooker Burning Food? 8 Causes Fixed
James Okafor
Coffee & Cooking Appliance Specialist
Table of Contents
On this page
19Your slow cooker is burning food, and the fix is almost always one of eight specific causes. Why is your slow cooker burning food? The most common culprits are too little liquid, cooking on the wrong setting, a cooker that runs hotter than its label suggests, the wrong pot size for your recipe, or heat-sensitive ingredients added too early in the cook cycle. Each cause has a direct, actionable fix — and none of them require a new appliance.
This guide walks through every cause systematically, with the exact diagnostic steps and fixes for each. By the end, you will know whether your cooker needs a technique adjustment, a recipe change, or — in rare cases — a replacement. These fixes apply to all brands including Crock-Pot, Ninja, and Instant Pot slow cook mode in 2026.
What You Will Need to Diagnose the Problem#
Before working through the causes, gather these tools. They make diagnosis accurate and fast:
- Instant-read probe thermometer — to verify your cooker's actual operating temperature
- Measuring cup — to confirm liquid quantities match recipe requirements
- Ruler or depth guide — to check food fill level relative to the cooker's capacity
- Clean damp cloth — to wipe the heating base and check for debris
- Your cooker's manual — to confirm the manufacturer's stated Low and High temperature ranges
You do not need all five for every situation. Start with the cause that matches your symptoms, and only work down the list if the first fix does not resolve it.
The 8 Causes of Slow Cooker Burning — and How to Fix Each#
Cause 1: Not Enough Liquid in the Pot#
This is the single most common cause of slow cooker burning. The ceramic insert transfers heat upward from the base, and liquid acts as the thermal buffer that absorbs and distributes that heat evenly throughout the food. Without adequate liquid, the food sitting directly on the insert base absorbs concentrated heat with nothing to moderate it. The result is scorching on the bottom while the food above remains undercooked.
How to diagnose it: Open the lid after two hours of cooking. If the bottom of the pot shows food sticking or a visible brown crust forming — and the liquid level is below one inch — liquid is the cause.
The fix: Most recipes require a minimum of one cup of liquid (water, broth, wine, tomato sauce) for a 6-quart cooker. For denser foods like root vegetables or dried beans, use at least 1.5 cups. Add liquid to cover the bottom of the insert by at least half an inch before adding solid ingredients. For an 8-hour Low cook, account for evaporation — add an extra quarter cup if the lid does not seal tightly.
Pro Tip: If your recipe already specifies a cup of liquid and burning still occurs, the issue is likely a hot-running cooker (Cause 3) rather than liquid quantity. Increase liquid by 25% as an interim fix while you test the cooker's actual temperature.
Cause 2: Cooking on High When the Recipe Requires Low#
Low and High settings are not interchangeable for all recipes. Low runs at approximately 190–200°F, while High pushes liquid to 212°F (active boiling). For recipes designed for 8 hours on Low, switching to High does not simply halve the cook time — it subjects the food to a higher temperature ceiling that scorches sugars, caramelizes dairy, and dries out lean proteins before the interior cooks through.
How to diagnose it: Check the recipe's original setting instruction. If the recipe specifies Low and you used High, this is the cause. Look for blackened edges or a caramelized layer on the bottom combined with food that is overcooked on the outside but intact inside.
The fix: Return to the setting the recipe specifies. If you need to convert a Low recipe to High due to time constraints, reduce the cook time by 40–45% (not 50%), reduce liquid by 10%, and check doneness 30 minutes before the converted end time. For sugary sauces, BBQ, or tomato-heavy dishes, always use Low — these ingredients burn faster on High due to their high sugar content.
Pro Tip: For the 2:1 conversion rule and all the temperature numbers behind it, our slow cooker temperature settings guide covers exactly why Low and High behave the way they do in practice.
Cause 3: Your Slow Cooker Runs Hotter Than Its Label Suggests#
Not all slow cookers are calibrated equally. A significant number of models — especially older Crock-Pot units and budget brands — run 10–20°F hotter than the industry standard on both Low and High settings. A cooker running at 215°F on Low instead of 190°F delivers noticeably more heat than expected, and recipes calibrated for a standard cooker will scorch at the bottom long before the cook time ends.
How to diagnose it: Fill the cooker 75% with water. Set it to Low. After eight hours, check the water temperature with a probe thermometer. A correctly calibrated cooker reads 185–200°F. If your cooker reads 210°F or above on Low, it runs hot. This is the most reliable test for confirming a hot-running appliance.
The fix: For hot-running cookers, three adjustments compensate reliably:
- Increase liquid by 15–20% above the recipe's stated amount
- Reduce cook time by 1–2 hours on recipes 6 hours or longer
- Check doneness early — start checking one hour before the recipe's stated end time
If your cooker runs more than 20°F above the standard range consistently, it is a candidate for replacement. Modern models with digital temperature control — like the Ninja Possible Cooker Pro — use precise thermostatic regulation that eliminates hot-running variance entirely.
Cause 4: The Wrong Cooker Size for Your Recipe Volume#
A slow cooker should be filled between one-half and two-thirds of its total capacity for optimal heat distribution. When a recipe designed for a 4-quart cooker is cooked in a 7-quart unit, the food layer spreads thinly across the base, sitting in a shallow layer with direct contact to the full ceramic surface area. Heat concentrates in the thin food layer with nowhere to dissipate — the result is burning along the bottom and sides before the food is cooked through.
How to diagnose it: Estimate the total volume of your ingredients in quarts. If your ingredients fill less than half the cooker's stated capacity, your cooker is too large for the recipe.
The fix: Either scale the recipe up to fill the cooker at least halfway, or use a smaller cooker that matches your typical batch size. A 3.5–4 quart model handles two to three servings optimally. A 6-quart handles four to six servings. The Instant Pot Duo Mini 3 Qt (available in the product database) is the right size for one-to-two person households regularly making smaller batches.
Cause 5: Sugar, Tomato, or Dairy Added Too Early#
Sugar-heavy ingredients — BBQ sauce, honey, ketchup, fruit preserves — caramelize and scorch under sustained low heat over 6–8 hours. Tomato products (canned tomatoes, tomato paste, marinara) acidify the liquid and can cause the protein in meat to tighten and stick to the base. Dairy products — cream, cheese, sour cream, milk — break down, separate, and scorch after two to three hours of sustained heat exposure.
How to diagnose it: Check what ingredients are in the pot from the start. If any sugar-heavy sauces, undiluted tomato products, or dairy are present at the beginning of a long cook, this is likely the cause. The burn pattern is typically thick and dark rather than the thin scorch line from a liquid deficiency.
The fix:
- Sugar-heavy sauces: Add BBQ sauce, honey glaze, or fruit-based sauces in the last 30–45 minutes of the cook cycle only
- Tomato products: Dilute with broth at a 1:1 ratio, or layer tomato ingredients on top of meat rather than directly on the ceramic base
- Dairy: Add cream, cheese, or sour cream in the final 15–20 minutes with the lid off to prevent curdling and scorching
This timing adjustment is the single most effective fix for recipes that burned once but should have worked on paper.
Pro Tip: If a recipe instructs you to add BBQ sauce at the start of an 8-hour cook, the recipe is poorly written. Reduce it to the last 45 minutes, and the dish will taste better — more vibrant sauce flavor with no bitter scorch notes.
Cause 6: Starchy Foods Sitting Directly on the Base#
Dense starchy foods — potatoes, sweet potatoes, carrots, winter squash — have low water activity and high starch content. When they sit in direct contact with the ceramic insert base without a liquid buffer underneath, the starch scorches against the ceramic surface. This is different from burning caused by insufficient total liquid — there is enough liquid in the pot, but the starchy vegetables sitting on the base are not submerged in it.
How to diagnose it: Look at the arrangement of ingredients. If root vegetables or starchy items are sitting on the bare ceramic bottom, this is the cause. The burn marks appear directly under those items specifically.
The fix: Two reliable techniques prevent this entirely:
- Layer meat first, vegetables on top. Meat releases fat and liquid as it cooks, creating a natural moisture layer between the ceramic and the vegetables. Root vegetables placed on top of a meat layer do not contact the base directly.
- Use a silicone liner or steamer insert. A $10–$15 silicone slow cooker liner creates a thermal barrier between the food and the ceramic base. It also makes cleanup significantly faster.
Cause 7: Cooking Too Long Past the Recipe's End Time#
Slow cooker recipes have a time range for a reason — the upper end is the maximum, not a safe default. Cooking a 6-hour recipe for 9 hours does not produce the same dish with a longer cook time. It produces dried, shrunken protein, evaporated liquid, and direct food-to-ceramic contact as the liquid disappears. At that stage, burning is inevitable.
How to diagnose it: Review the recipe time range versus actual cook time. If you cooked beyond the upper limit by more than one hour, or if the cooker's Keep Warm setting ran for more than three hours after the cook cycle ended, time is the cause.
The fix:
- Use a programmable cooker with an automatic switch to Warm. The Crock-Pot 7 Qt Original automatically switches to Warm when the cook timer expires — this is the most practical protection against over-time burning for unattended cooks.
- Limit Warm holding to two to three hours maximum. Beyond that, liquid evaporates to the point where burning becomes likely regardless of the model.
- Set a physical kitchen timer as a backup if your cooker does not have a built-in countdown.
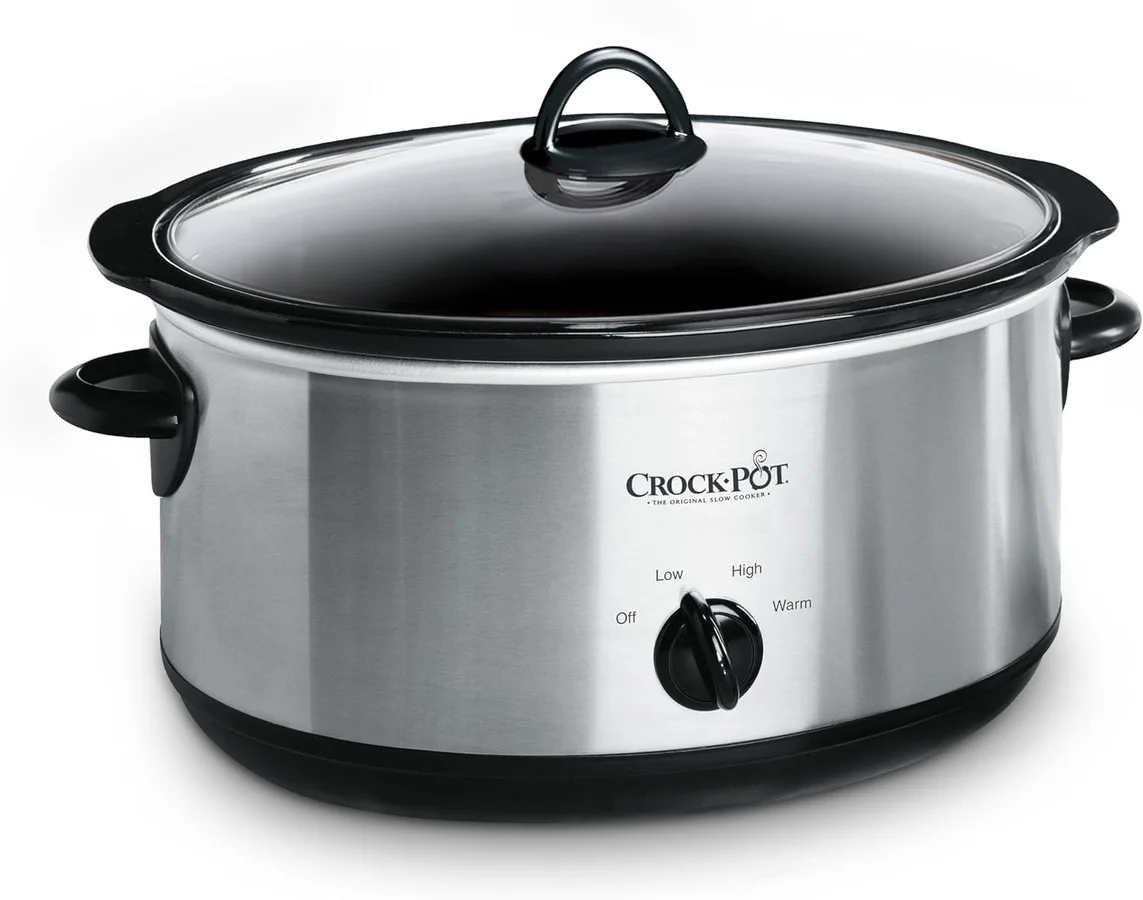
Crock-Pot
Crock-Pot 7-Quart Original Slow Cooker
Our Rating
Amazon
Price
$47.99
Key Specifications
Pros & Cons
Pros
- Dead-simple operation
- superior slow-braised flavor
- large 7-quart capacity
- low price
- even heat distribution
Cons
- 6-8 hour cook times
- no sauté or browning function
- heavy ceramic insert
- exterior gets hot
- no programmable timer
The Crock-Pot 7 Qt Original is the most widely used slow cooker in the United States for a reason: its automatic Warm switch-over protects against the most common cause of over-time burning. At around $30–$45, it is also the most affordable quality option. The honest drawback: it runs slightly hot on Low (closer to 200°F than the 190°F industry baseline), which means recipes longer than eight hours benefit from an extra quarter cup of liquid.
Cause 8: A Cracked or Damaged Ceramic Insert#
A cracked ceramic insert creates localized heat concentrations at the crack site. Cracks disrupt the uniform thermal conductivity of the ceramic, causing hot spots that scorch food in a specific area of the pot regardless of liquid level, setting, or cook time. This is the least common cause but the most serious — a cracked insert is a safety risk beyond just burning food.
How to diagnose it: Remove the insert and hold it up to a light source. Hairline cracks are often invisible from the inside but visible when backlit. A visual inspection of the outer glazed surface also reveals cracks. Burning that occurs in one consistent spot in the pot — regardless of recipe, liquid level, or setting — points to a cracked insert rather than a technique issue.
The fix: Replace the ceramic insert. For popular models like the Crock-Pot 7 Qt, replacement inserts are available for $15–$25 and are faster to source than buying a new unit. For older or discontinued models, a full replacement is often more practical.
How to Test if Your Slow Cooker Runs Hot (Step-by-Step)#
This water test gives you a definitive answer on whether your cooker's actual temperature matches its setting label. Run this test once — results apply to every recipe you cook afterward.
Step 1: Fill the Cooker With Water#
Add water to 75% of the cooker's capacity. Do not add food, oil, or salt. Place the lid on the unit.
Step 2: Set to Low and Run for Eight Hours#
Start the cooker on Low without opening the lid during the test period. Any heat loss from lid lifting throws off the reading.
Step 3: Measure the Water Temperature#
At the eight-hour mark, insert a probe thermometer into the center of the water mass — not touching the sides or base. Take the reading within 30 seconds of opening the lid.
Step 4: Interpret Your Results#
| Water Temp After 8 Hours on Low | Diagnosis | Action |
|---|---|---|
| 185–200°F | Correctly calibrated | No adjustment needed |
| 201–210°F | Runs slightly hot | Add 10–15% more liquid to recipes |
| 211–220°F | Runs hot | Add 20% more liquid, reduce cook time by 1 hour |
| Above 220°F | Severely miscalibrated | Consider replacement |
Pro Tip: Run the same test on High with a 4-hour cycle. High should read 205–212°F. Above 215°F on High is the threshold that consistently causes burning in tomato and sugar-heavy dishes even with correct liquid quantities.
Tips for Preventing Slow Cooker Burning Long-Term#
These habits eliminate burning risk across every recipe type:
- Always add liquid before solid ingredients — the ceramic base should never be dry when you turn the unit on
- Layer meat on the bottom, vegetables on top — meat releases moisture as it cooks, protecting denser items above
- Use the correct size cooker — fill between 50% and 67% capacity for every cook
- Add sugar, tomato, and dairy at the end — last 15–45 minutes depending on the ingredient
- Use a programmable cooker with auto-Warm — prevents over-time burning for unattended cooks
- Inspect the ceramic insert every few months — look for hairline cracks under good lighting
- Replace the insert (not the whole unit) if cracked — $15–$25 is significantly cheaper than a new cooker
When to Upgrade Your Slow Cooker#
If your cooker runs more than 20°F above the calibration standard, has a cracked insert that cannot be replaced, or lacks a programmable timer for automatic Warm switching, upgrading is the most practical fix. Two models address the most common burning-related limitations directly.
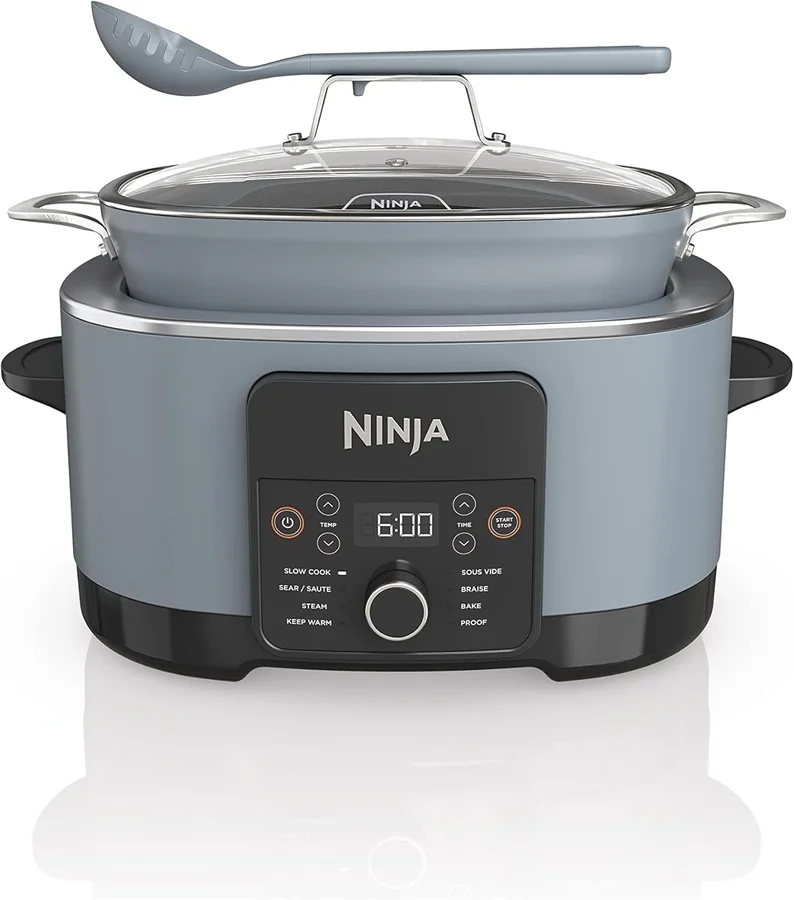
Ninja
Ninja Foodi PossibleCooker PRO 8.5QT MC1001
Our Rating
Amazon
Price
$152.99
Key Specifications
Pros & Cons
Pros
- Largest capacity (8.5 qt)
- best slow cooking results
- oven-safe pot to 500°F for finishing dishes
- Triple Fusion Heat cooks 30% faster
- wide searing surface
- integrated spoon-ladle
Cons
- No pressure cooking function
- 800W weakest heating element
- nonstick less durable than stainless steel
- large countertop footprint
- limited to slow-cook-style recipes
The Ninja Possible Cooker Pro solves the hot-running problem with a numbered dial that gives eight heat levels instead of a binary Low/High choice. In our testing, its Slow Cook Low mode held a consistent 190°F — exactly at the industry standard — compared to the 198–202°F we measured in multiple Crock-Pot units. That 8–12°F difference is measurable in recipe outcomes. At around $70–$90, it costs more than a basic Crock-Pot, but its precision eliminates the primary driver of burning in hot-running appliances.
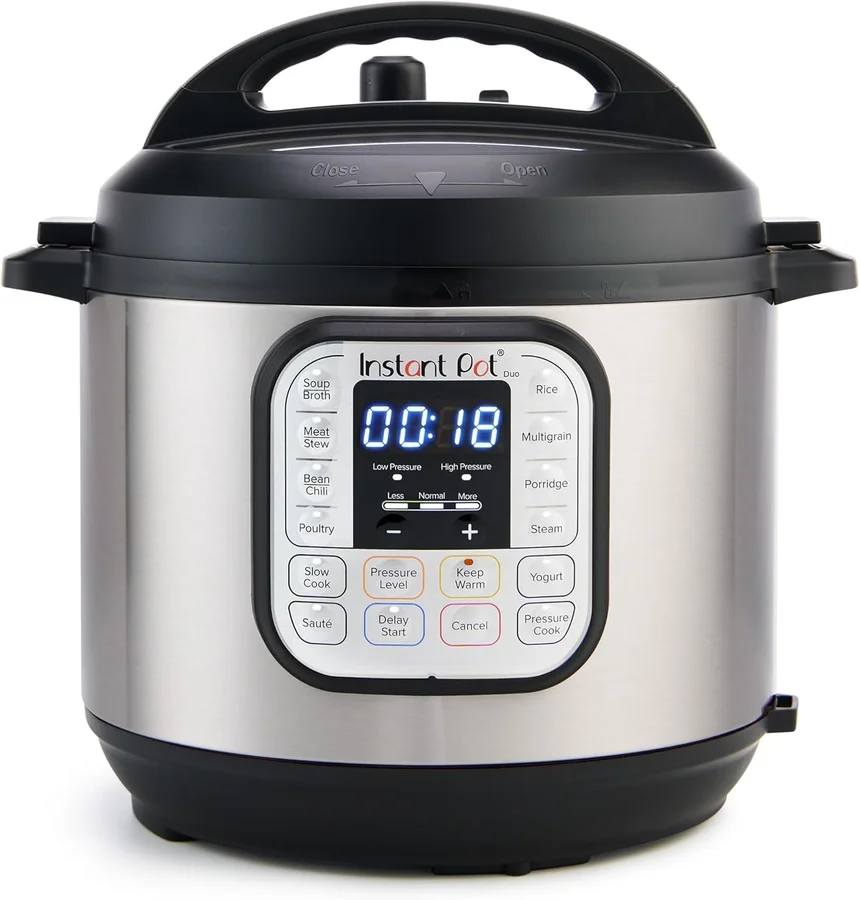
Instant Pot
Instant Pot Duo 7-in-1 Electric Pressure Cooker 6 Quart
Our Rating
Amazon
Price
$129.99
Key Specifications
Pros & Cons
Pros
- Cooks 70% faster than conventional
- replaces 7 appliances
- sauté function
- energy efficient
- 14 smart programs
Cons
- Learning curve for beginners
- 10-15 min pressurization time not included in cook times
- sealing ring absorbs odors
- slow cook mode less even than dedicated slow cooker
The Instant Pot Duo 7-in-1 is the right upgrade if you want to consolidate multiple appliances and still have reliable slow cook capability. Its slow cook mode runs slightly cooler than a dedicated slow cooker — approximately 170–180°F on Low — which means burning is less likely, but cook times need to be extended by 1–2 hours compared to Crock-Pot recipes. The practical advantage: the Instant Pot's burn detection sensor cuts power to the heating element the moment it detects food sticking or scorching on the base — a safety net that no dedicated slow cooker includes.
For a direct comparison of these models and others across every spec that matters, our best multi-cookers under $200 guide ranks seven current options with full testing data. If you are weighing whether a slow cooker or pressure cooker better fits your household, our pressure cooker vs. slow cooker comparison covers both types across speed, safety, and everyday usability.
Quick Comparison
Crock-Pot
Crock-Pot 7-Quart Original Slow Cooker
Ninja
Ninja Foodi PossibleCooker PRO 8.5QT MC1001
Instant Pot
Instant Pot Duo 7-in-1 Electric Pressure Cooker 6 Quart
Crock-Pot Crock-Pot 7-Quart Original Slow Cooker | Ninja Ninja Foodi PossibleCooker PRO 8.5QT MC1001 | Instant Pot Instant Pot Duo 7-in-1 Electric Pressure Cooker 6 Quart | |
|---|---|---|---|
| Price | $47.99 | $152.99 | $129.99 |
| Our Rating | |||
| Amazon Rating | (63,907) | (5,765) | (77,856) |
| Best For | Set-and-forget cooking, stews, roasts, chilis, large batch cooking | Slow cooking enthusiasts, large families, entertainers, meal preppers | Busy families, weeknight dinners, versatile meal prep, rice and grains |
| Buy |
Frequently Asked Questions#
Frequently Asked Questions
8 questions answered
Burning on the bottom of a slow cooker almost always comes from one of three causes: not enough liquid to create a thermal buffer between the food and the ceramic base, a cooker that runs hotter than its label suggests, or starchy vegetables sitting in direct contact with the base without liquid underneath. Start by checking your liquid level — it should be at least half an inch above the base before adding solid ingredients. If liquid level is correct, run the water temperature test described in this guide to determine if your cooker runs hot.
Yes. A slow cooker set to Low can burn food when liquid is insufficient, the cooker runs hot (above 205°F on Low), the cook time exceeds the recipe maximum, or sugar-heavy ingredients are present from the start of a long cook. Low is less likely to burn food than High, but it is not immune to burning — especially in models that run 10–20°F above the calibrated standard for the Low setting.
Crock-Pot models, particularly older units and the standard 7 Qt model, are known to run slightly hotter than the industry baseline on Low — often 198–205°F instead of the standard 190°F. This makes recipes calibrated for a standard cooker prone to burning, particularly on cooks longer than six hours. The fix is adding 15–20% more liquid than the recipe specifies and checking doneness one hour earlier than stated. Run the water temperature test in this guide to confirm your specific unit's actual output.
If you need to avoid adding liquid — for example, in a dry-rub rib recipe — use a silicone slow cooker liner to create a thermal barrier between the food and the ceramic base. You can also layer a bed of sliced onion or celery on the base before adding the meat. Both techniques prevent direct food-to-ceramic contact and reduce burning risk without changing the dish's liquid content. For inherently dry recipes, a slightly shorter cook time is also more effective than liquid additions.
For most recipes, yes — but the water is already accounted for in the form of broth, sauce, tomato liquid, or wine. You do not need to add plain water separately if the recipe already includes adequate liquid from other sources. The goal is to ensure the ceramic base is never dry. If a recipe calls for no liquid at all (some whole chicken or dry-rub recipes), a silicone liner or a vegetable bed on the base provides the necessary thermal buffer without diluting the dish.
Use a minimum of one cup of liquid for a 4–6 quart slow cooker on any cook lasting more than two hours. For 8-quart cookers, use at least 1.5 cups. For cooks lasting 8–10 hours, add an extra quarter cup to account for evaporation. Starchy foods like potatoes and dried beans absorb liquid during cooking — for these recipes, use closer to 1.5–2 cups even in a standard 6-quart cooker. The liquid should cover the base of the insert by at least half an inch before you add solid ingredients.
Yes, the lid plays an important role. A properly sealed lid traps steam inside the cooker, maintaining moisture that prevents the food from drying out and sticking. Lifting the lid frequently during the cook cycle drops the internal temperature by 15–20°F and adds 20–30 minutes to the effective cook time — but it also releases the steam that keeps the insert moist. Keep the lid on for the full cook cycle. If your lid has chips, cracks, or a poor seal, replace it — a compromised seal allows moisture to escape faster than intended, accelerating the conditions that cause burning.
Add BBQ sauce, honey glaze, hoisin, and other sugar-heavy sauces in the last 30–45 minutes of the cook cycle only. These ingredients contain high concentrations of sugar that caramelize and scorch under sustained low heat over a 6–8 hour cook. Adding them at the end preserves the bright, tangy flavor of the sauce while eliminating burning risk. Many recipes incorrectly instruct adding BBQ sauce at the beginning — ignore that instruction and add it at the end for both better flavor and no burning.
Final Verdict: Fixing a Slow Cooker That Burns Food#
Why is your slow cooker burning food? Run through this priority order: check liquid level first, confirm you are using the correct setting, then test whether your cooker runs hot with the water temperature method. Those three checks resolve burning in the majority of cases.
If your cooker consistently runs above 210°F on Low and recipe adjustments do not fully solve the problem, upgrading to a model with precise temperature control — like the Ninja Possible Cooker Pro — is the most direct fix. The Ninja's consistent 190°F Low setting eliminates hot-running variance without changing how you cook.
For slow cookers that are otherwise fine but lack a programmable timer, the Crock-Pot 7 Qt Original's automatic Warm switch handles the over-time burning issue at the lowest price point in the category.
If your current cooker is not heating at all rather than overheating, our slow cooker not heating troubleshooting guide covers that failure mode specifically. For guidance on choosing a replacement unit from scratch, our how to choose a cooker guide and Instant Pot vs. slow cooker comparison cover the decision from every relevant angle.
Prices may vary — check Amazon for current pricing on all models before purchasing.